
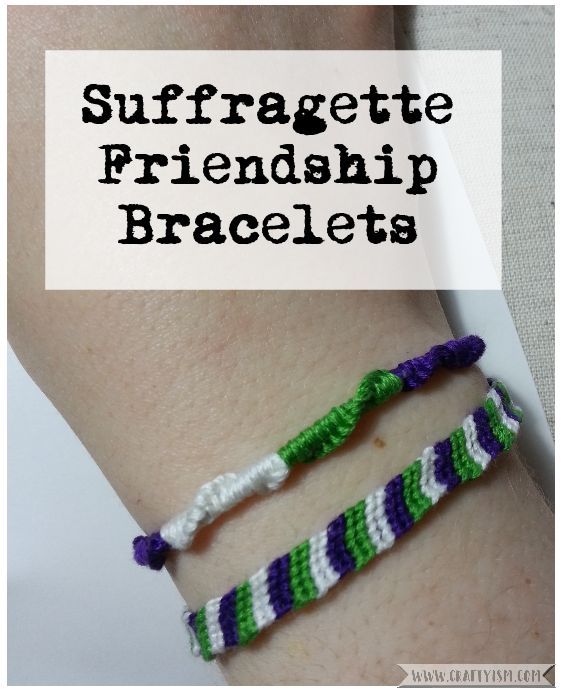
This week we celebrate International Women’s Day. Also, this year marks 100 years since the Representation of the People Act was passed in Britain in 1918. From that time, some women over 30 and all men over 21 were given the vote. To mark this, I have made two styles of friendship bracelets in the Suffragette colours of green, white and purple.
Follow along to make your own friendship bracelets and commemorate the Suffragettes.
You will need:
- Green embroidery thread
- White embroidery thread
- Purple embroidery thread
- Pins
- 2 buttons
- A cushion
- Needle
- Scissors
- Ruler
Twisty Friendship Bracelet:
Step 1:

To make the twisty friendship bracelet, take your embroidery thread and measure out 1.5 meters of each colour. Group the threads together, fold in half and tie a knot at the folded side, leaving a loop. This is how you will fasten the bracelet, so make sure that the button will fit through the loop.
Use a pin to secure the threads to a cushion through the knot. This will make it easier for you to work on the bracelets.
Step 2:
 Start with the two green threads. Pull them slightly to the left, then over the other coloured threads, creating a figure 4 shape. (Top photo)
Take the tail of the green thread under the other coloured threads and through the gap made by the green threads. (Second photo)
Pull the green thread up to create a knot. The knot should rest at the base of the loop. (Third photo)
This is the basic knot that will be used to make all of the friendship bracelet. Keep knotting until you have completed 15 green knots.
Step 3:
 Repeat the knotting technique, first making 15 white knots, then 15 purple knots.
Do the whole thing over again, starting with the green. You want to end up with two sets of each colour. If you have larger or smaller wrists, you may need to adjust the number of knots you make.
Step 4:
 Once you have finished knotting, plait the remaining threads until the bracelet will fit around your wrist. Knot the ends when you are done.
Step 5:
 Take one string of threads and thread through a needle. Use this the sew a button over the knot at the end of the threads. Secure, then trim off the remaining threads.
Your twisty bracelet is finished!
Striped Friendship Bracelet:
Step 1:

To make the striped friendship bracelet, cut 2 meters of each colour thread. Gather, fold and knot to make a loop as you did for the twisty friendship bracelet.
Secure to the cushion with a pin.
Step 2:

Lay out your threads so you have two green, two white then two purples. Take the first green thread on the left and create a knot over the second green thread. Use the same knotting technique as you did for the twisty friendship bracelet.
The first and second green threads will now have swapped places. (Second photo) Keep using this green thread and make a knot over every remaining coloured thread. (Third photo)
Step 3:
 Repeat a row of knots using the second green threads. You should now be able to see a strong green stripe at the base of the loop. (Top photo)
Keep knotting in this way, always starting with the first thread on the left. You should see stripes of white, then purple forming.
Step 4:

Continue knotting, making sure to keep threads in place to maintain the pattern. As your friendship bracelet gets longer, it might start to twist a bit, making it hard to knot. You can use more pins to flatten the bracelet by attaching to the cushion.
Keep knotting until the friendship bracelet will fit around your wrist.
Step 5:

Tie a knot to secure all the threads. Take a button and attach as you did for the twisty friendship bracelet. Trim off the remaining threads.
Your striped friendship bracelet is finished!
 There is meaning behind each of these colours; green for hope, white for purity and purple for loyalty. Some people think that purple should actually be violet and that the initials of the colours stand for Give Women (the) Vote!
Of course, I have used these colours to commemorate the Suffragettes and Representation of the People Act 1918. However, use what ever colours you like. The more colours you use for the striped friendship bracelet, the thicker it will be, so have fun experimenting!
I think these Suffragette friendship bracelets would be great to wear to the polling station. I’d love to know where you’d wear yours.
This blog post contains sponsored content, affiliate or referral links which may reward me in the event of a subscription or sale. I use these funds to feed my cat and buy more craft stuff. My cat and I thank you! For more information click here.
