
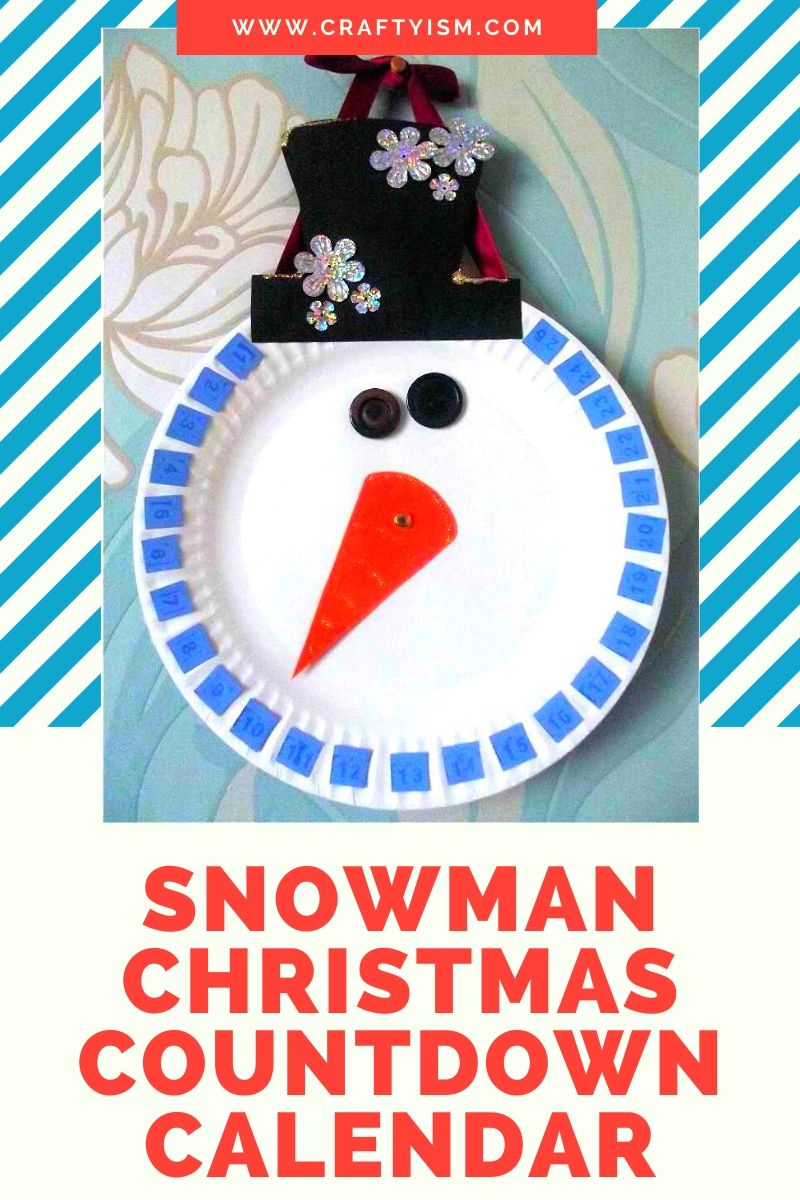
It seems to me that people have started getting ready for Christmas even earlier this year. I know a few people who have told me that they have already done all of their present shopping and have it wrapped! I am much less organised, and to be honest I enjoy my annual last minute panic of wrapping presents on Christmas eve whilst watching a mountain of seasonal films. However, in an effort to be more organised this year, I have made this cute Snowman Christmas Countdown Calendar that will count down how many sleeps are left until Christmas. This is a really quick and easy make that would be perfect to do with children!
You will need:
- A white paper plate
- 3 sheets of card – blue, black and orange
- Stamp set with numbers and ink pad
- A butterfly pin
- 2 buttons
- Ribbon
- PVA glue
- Snowflake sequins
- Glitter glue
- Scissors
- Ruler
- Pencil
This blog post contains sponsored content, affiliate or referral links which may reward me in the event of a subscription or sale. This doesn’t cost you any extra. I use these funds to feed my cat and buy more craft stuff. My cat and I thank you! For more information click here.
Step 1:

Take the blue piece of card and mark out 25 small squares, I made mine 1.5cm in size. Cut out the squares.
Step 2:

Using the stamp set and ink pad, stamp the numbers 1 to 25 individually, on the squares.
Step 3:

Start with the square which has 13 stamped on it, and glue it to the bottom edge of the paper plate, in the middle. Then start to glue the other numbers in place spreading out each side of the number 13 square. You want to have the numbers counting down, so 25 will be the top right number and 1 will be on the top left.
Step 4:

Next to make the Snowman’s carrot nose, which will also be the count down pointer. Measure from the rough centre of the plate, to just above the numbers and use this measurement to cut out a carrot shape from the orange card. My carrot was 9cm long! Place the carrot on the plate and mark the centre point with a pencil (see pink dot on picture 3) Use scissors to poke a hole through both the carrot and the paper plate behind. Place the butterfly pin in through that hole. Turn the plate over and open out the wings of the pin to secure the carrot nose onto the plate.
Step 5:

Using the black card, cut out a little top hat for the Snowman, and glue into position at the top of the plate in between the numbers.
Step 6:

Glue the two buttons just above the carrot to make the eyes. My buttons are slightly different sizes, but I think it makes the Snowman look quite cute!
Step 7:

Next, the fun bit, decorate your Snowman! I found some sequins that looked a bit like snowflakes and glued them to the hat. Lastly I used some glitter glue to add ridges onto the carrot and some snowy accents onto the top hat.
Step 8:

Take a length of ribbon and glue at the back of the top hat, ready to hang on a wall or from a door handle.

Finally display your Snowman Christmas Countdown Calendar in pride of place, and each morning, spin his pointy nose a little closer to the final 1 sleep ’till Christmas marker!
If you like a more traditional advent calendar, check out my list of the Top 10 Advent Calendars for Crafters.

I love this, it’s so cute and looks simple to make so I might give it a go!
Thank you! And you’re right, it’s really easy and can be customised with anything you have in your craft stash!