
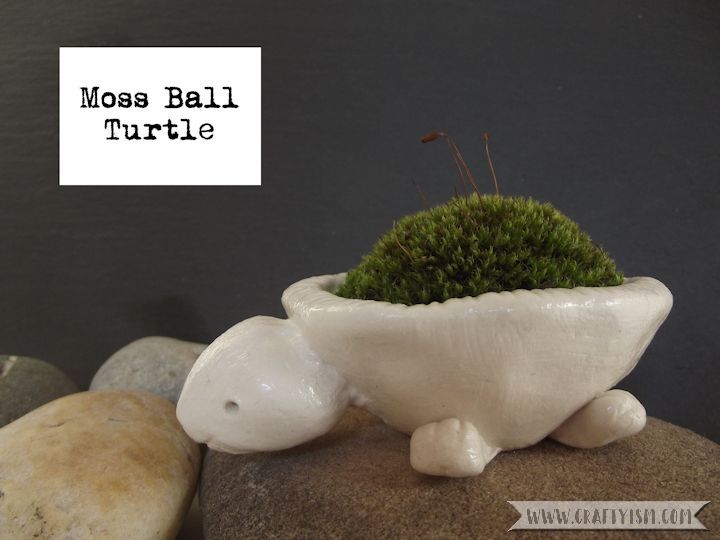
Bring the outside in with this tutorial on how to make a Moss Ball Turtle.
I love Pinterest and on my Outside In board I pinned this image of a ceramic moss ball planter in the shape of a rabbit.
I think moss balls look great as house plants, but I thought the rounded shape would better suit a different animal, a turtle! Find out below how you can make your own little Moss Ball Turtle friend.
You will need:
- A cutting board or piece of card covered in Clingfilm
- White air-dry clay
- Sponge or kitchen paper
- Small bowl of water
- A skewer
- A smoothing tool
- Clear varnish
- Paintbrush
- Small amount of gravel
- A moss ball
Step 1:

Use the cutting board or piece of card covered in Clingfilm as a work surface so that the clay doesn’t stick.
From the packet tear off two pieces of clay, one larger and one smaller. With the larger ball, mould and oval bowl shape with your fingers. Make the sides quite thick, this will be the body of the turtle and where the moss ball will sit. When you have finished shaping, take a damp sponge or wad of kitchen paper and smooth out any cracks and knobles on the bowl. Set aside for now.
Step 2:

Take a ball from the smaller piece of clay and using the body as a guide for size, mould the head. This should be the shape of a strawberry. Using the skewer, make two small holes for eyes and line for the mouth. Flatten the side of the head which will attach to the body. Use the skewer again and roughly scratch this flat surface. This will help you to stick the head to the body later on.
Step 3:

Using the rest of the small piece of clay, make four small ovals for feet and a little triangle for a tail. With the skewer, make two lines in each foot for the toes and scratch the joining section of each piece as in step 2. Mark the rim of the bowl with small lines to make a shell decoration.
Step 4:

Lay out the head, feet and tail where you would like them around the body. Using this as a guide, scratch the body with the skewer in the places where the smaller pieces will be joined.
Step 5:
 Take a tiny piece of clay from the packet and mix it in a small bowl with a little water to make a paste. This is called slip and is basically a clay glue. Along with the scratch marks, this will create a strong bond for all the pieces. Using a paint brush, paint some slip onto all the scratch marks and join up the pieces to the body. Using the smoothing tool and a little slip, smooth over all the joins until they are completely smooth.
Set aside the turtle and leave to dry completely. This could take a few days depending on how hot it is where you live.
Step 6:

Once the turtle is completely dry, use a paint brush and apply a layer of clear varnish all over. Wait for this to dry and apply one more coat.
Step 7:
 For the moss ball, you could either buy one, or pick your own. I found this patch of moss in my front garden. One of the moss balls was the perfect size to go in the turtle. If you are picking your own, take a knife and carefully lift up the whole moss ball, bringing up as much as the surface underneath as possible. Be careful if you are collecting moss out in wild. Check first with the land owner for permission and make sure to only pick what you need and leave plenty behind.
Step 8:
 Moss doesn’t actually need to live on soil as it gets its nutrients from the air. However, my moss ball didn’t quite sit at the bottom of the turtle bowl. So to give the moss something to sit on, I put a small handful of fine gravel at the bottom of the bowl. Next I carefully placed the moss ball in the bowl and gently pressed it into the gravel. And that’s it an adorable Moss Ball Turtle!
To keep your Moss Ball Turtle alive, keep it out of direct sunlight and heat and mist with a spray bottle of water when it starts to dry out. I have read that you should use rain water to this as tap water doesn’t have the compounds that moss likes.
I am seriously in love with my Moss Ball Turtle, he lives on a rock on my bookshelf! Do you have any other tips for growing moss or ideas on what other animals I could make? Perhaps I will make a moss ball zoo!
This blog post contains sponsored content, affiliate or referral links which may reward me in the event of a subscription or sale. I use these funds to feed my cat and buy more craft stuff. My cat and I thank you! For more information click here.
