
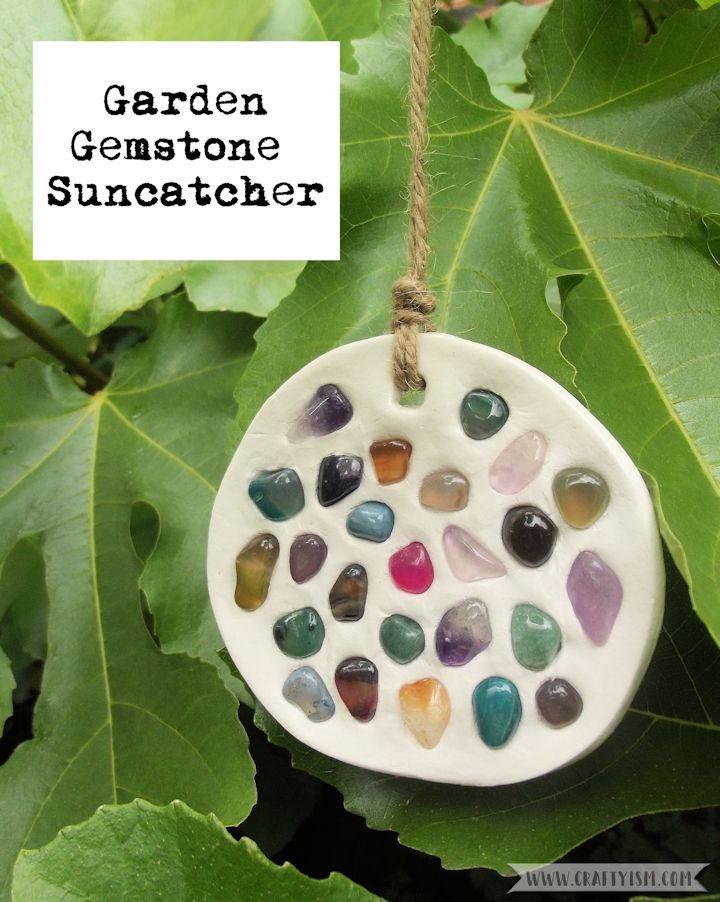
Hello summer! Here I will show you how to brighten up your garden with a Gemstone Suncatcher.
The sun has finally come out and that means a chance to sit out in the garden! This year I have been enjoying growing some vegetables, which is great but it’s all a bit too green. So in an effort to inject colour into my garden I have made a Gemstone Suncatcher out of clay and brightly coloured stones. Follow along if you’d like to brighten up your own garden.
You will need:
- A cutting board or piece of card covered in Clingfilm
- White air-dry clay
- A round cookie cutter
- A skewer
- A chopstick
- Small, coloured gemstones
- An emery board or sandpaper
- Clear varnish
- Paintbrush
- String
Step 1:
 Use the Clingfilm covered board as a work surface to stop the clay sticking. Tear off a piece of clay from the packet and roll it out to about 5mm thickness. Take the cookie cutter and cut out a circle (re-seal the excess clay quickly in the packet, so it doesn’t dry out and you can use it again)
Step 2:
 Taking the thick end of the chopstick, make a large hole in the centre top of the circle. This will be where you attach the string later on. Then, using the skewer, make a number of small holes around the circle. These could be in a random formation like mine, or in a pattern. Make sure that the number of holes matches the number of gemstones you have.
Step 3:
 Quickly press a gemstone into each hole that you have made. The idea is that when you hang up your Gemstone Suncatcher, the light will shine through the holes and light up the colours of the gems. Make sure the gemstones are well pressed into the clay, but not coming through to the other side.
Step 4:
 Carefully flip your Gemstone Suncatcher over. Use the skewer to re-open any holes that might have been squashed together when you pressed in the gems. Then using your finger, gently smooth over the top of these holes so they don’t stick out so much. Turn the Gemstone Suncatcher over again, and lay it flat. Put it somewhere safe where it can dry out. This may take a few hours or a few days depending on how hot it is where you live.
Step 5:
 Once your Gemstone Suncatcher is fully dry, use an emery board or piece of fine sandpaper and gently smooth out any rough areas. On my suncatcher, I needed to smooth the outside edge and some of the holes on the back. Make sure to brush away all of the clay dust, once you have finished sanding.
Step 6:
 Using a paintbrush, apply a thin layer of clear varnish to the front of the Gemstone Suncatcher (I used Mod Podge Gloss). When this is dry, turn it over and apply varnish to the sides and the back. Wait until the varnish is dry and decide if you want to add an extra coat.
Step 7:

When the varnish is dry, cut a piece of string or thin ribbon and tie it through the large hole you made at the top of the circle. And that’s it, you’re done!
 Hang your Gemstone Suncatcher up in the garden amongst the tree branches. On a sunny day, the light will shine through the holes in the back and light up all the beautiful colours of the gemstones. If you don’t have a garden, you could always hang this on a window, it will look just as colourful! You could also paint the suncatcher before varnishing it, or use a shaped cookie cutter like a heart or star. Let me know if you have a go at making this, I’d love to see your creative variations.
This blog post contains sponsored content, affiliate or referral links which may reward me in the event of a subscription or sale. I use these funds to feed my cat and buy more craft stuff. My cat and I thank you! For more information click here.
